[pvcp_1]
In this article, I will define you how you can upload your website from local server to web hosting server by using FileZilla FTP Client. The Setting of FTP with FileZilla is very easy and allows you to transfer your website core files quickly and safely to a web server.
First of all, you need to go to Filezilla official website and then click on Filezilla-The free FTP solution, then go to quick download links and download the setup file as per your system requirements.
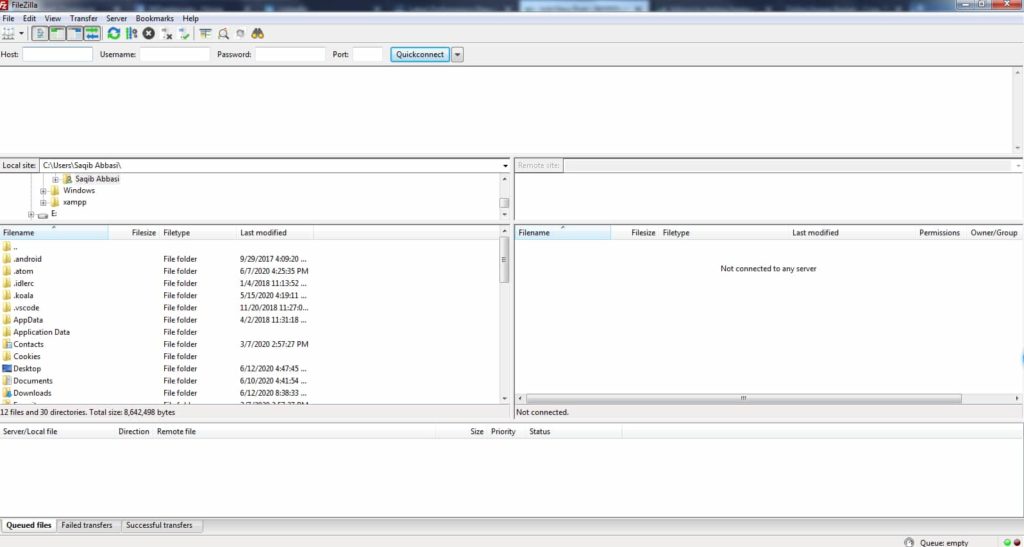
- Install FileZilla software and then launch the software. When you installed correctly this is how it looked.
- Go to your online purchased web hosting server Cpanel by using your domain name as ‘https://youdomainname.com/cpanel’. This step is the same for all hosting providers whether you’re using Bluehost, HostGator, Namecheap, Inmotion, or any other hosting provider company. You have to repeat the same step for all and it will help you to find out your server Host, Username, Password, and Port Number respectively.
- Now here you will have to find out FTP Accounts in file section.
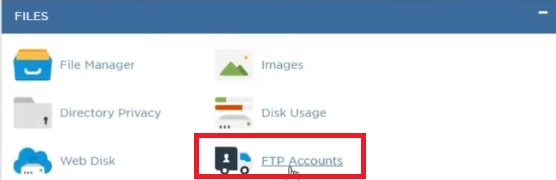
- Click on FTP Account If you don’t have then create the FTP Account and once created then it will look like:

- Click on Configure FTP Client, you will see a new tab with the name of Configuration Files then you will have three options for FTP. (1) Filezilla(for windows) (2) CoreFTP(for windows) (3) Cyberduck (for Mac).
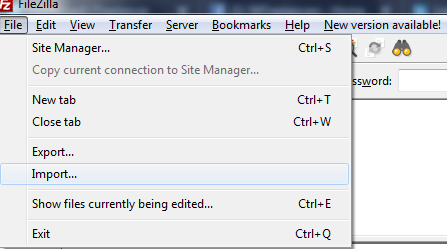
- Click on FileZilla (for Windows) and download the FTP configuration File. Once you are done then Open FileZilla software then click on File. There you will see some options in the file tab but you will have to click on Import.
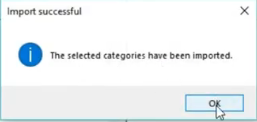
- Select the file which you have just downloaded from the CPanel and import. Once done correctly it will show the popup message.
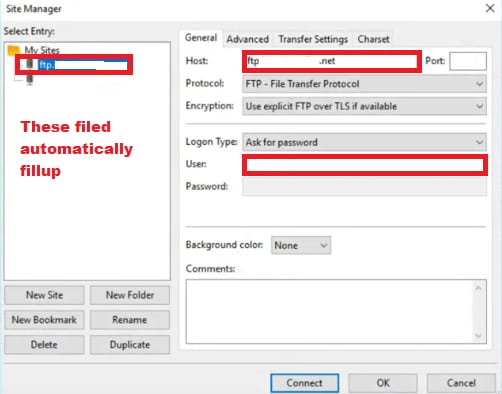
- Now click on File tab and open Site Manager. Now you will see the CPanel detail added in the site manager. Just need to click on Connect and it will ask you the password you will type the same password as you setup in the CPanel web hosting server.
- Once the online web hosting server connection is configured successfully you will see the configuration panel as shown in the below picture. e.g
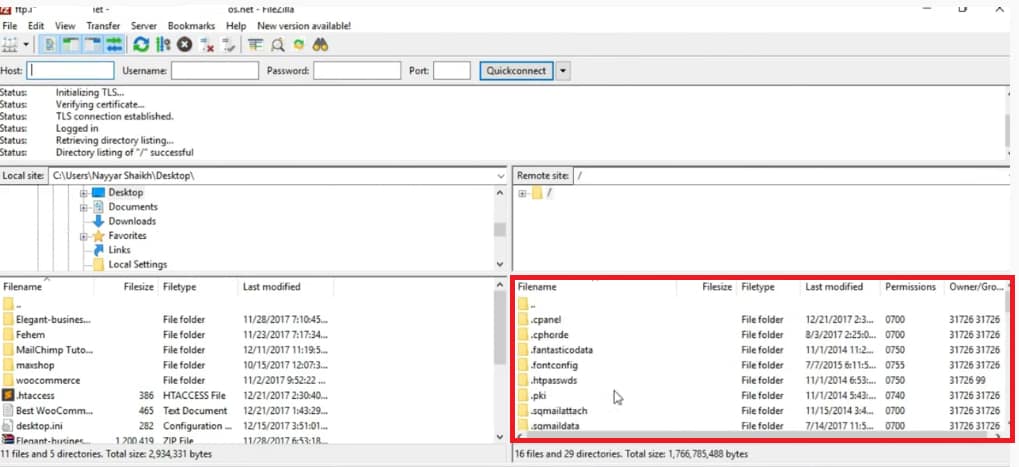
- Now you can access all the files which are under your server space. But don’t play all the files which are under your server, you just need to add your website files in public_html. If you have multiple sites add in the same server then you will have to find out the name of your current domain name folder which has added before. Open the same folder which you have created and then copy the Offline Server files Public_html and replace it with Online Server Public_html folder.
Hope this article helpful and now you know how to transfer the files from Offline server to Online Web Hosting Server by using FileZilla FTP Software. If you have any problem, please let me know in the comments box.


